
A mobile phone that suddenly stops charging can be frustrating, especially when the battery is low and the device is needed for everyday work, communication, banking, or study. Sometimes the problem is as simple as a damaged cable or dirty charging port. In other cases, the fault may be related to the battery, charging circuit, connector, or another internal component.
For a mobile repair technician, the important thing is not to replace parts randomly. A proper repair begins with observation, testing, fault identification, and then the correct repair procedure.
So, what does a technician actually check first when a mobile phone has a charging problem? Understanding this process can help beginners develop a more practical approach to mobile phone troubleshooting.
Why Is a Mobile Phone Not Charging?
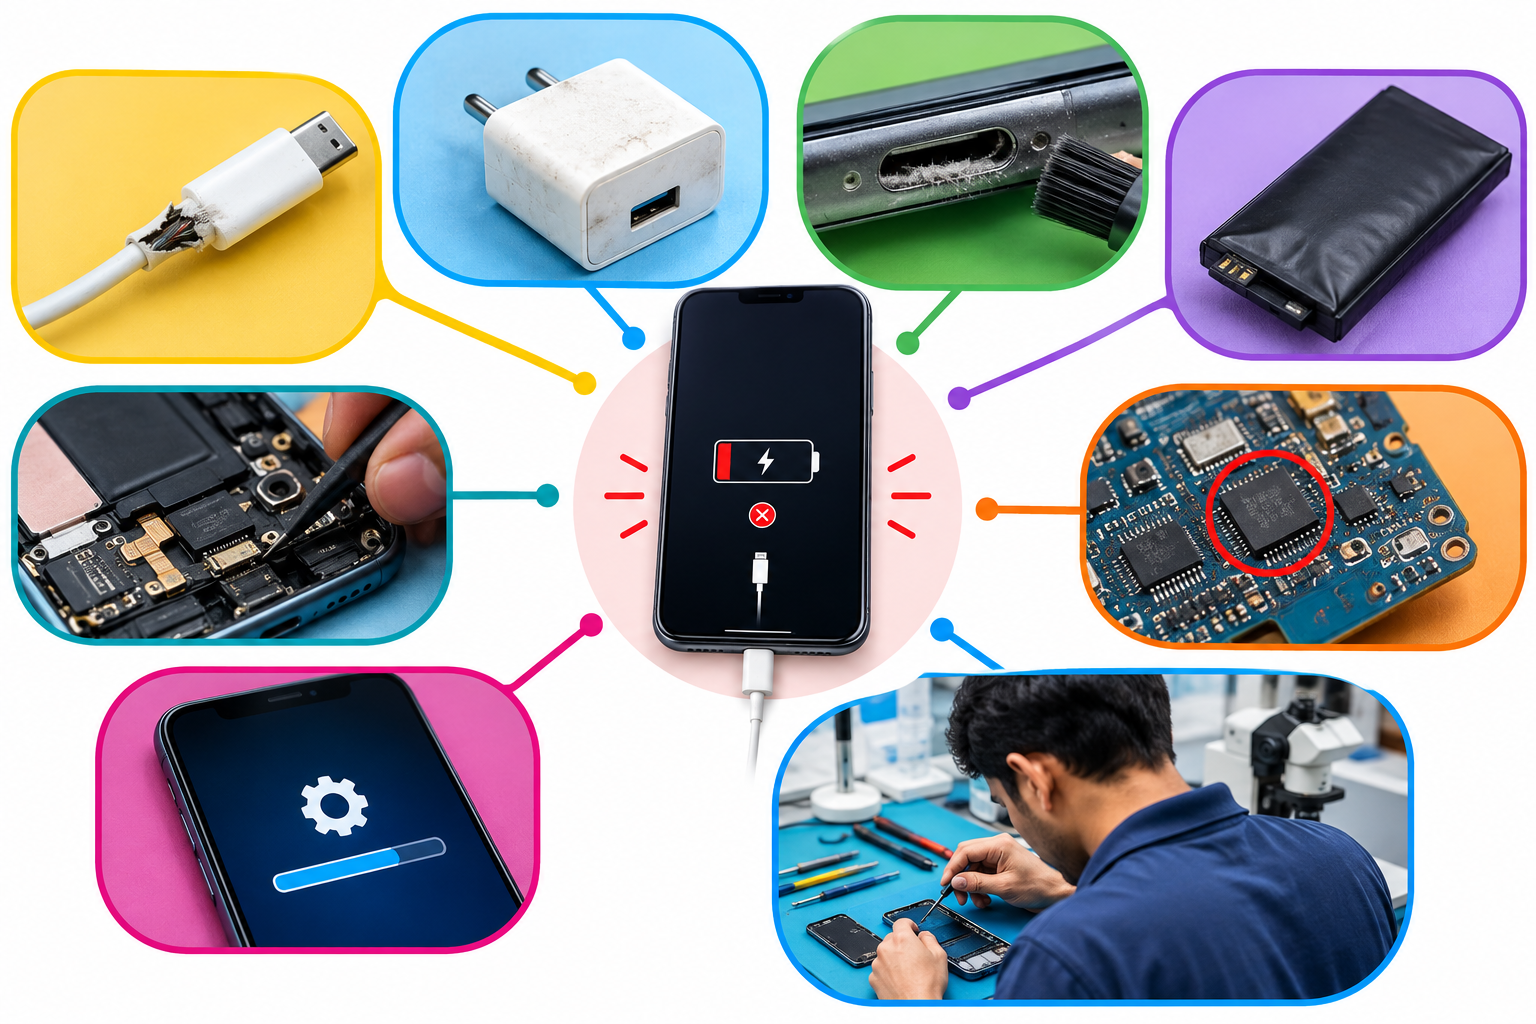
There can be several reasons behind a charging problem. The phone may not detect the charger at all, may charge very slowly, may connect and disconnect repeatedly, or may stop charging after a certain point.
Some common causes include:
-
Faulty charging cable
-
Damaged charger or adapter
-
Dirt or physical damage inside the charging port
-
Weak or damaged battery
-
Loose internal connection
-
Charging circuit fault
-
Component-level problem on the motherboard
-
Software-related charging behaviour
Because different faults can create similar symptoms, a technician needs to diagnose the actual cause before carrying out a repair.
What Does a Technician Check First?
A professional troubleshooting process normally starts with the simplest possibilities before moving toward internal testing. This helps save time and reduces unnecessary component replacement.
1. Check the Charger and Charging Cable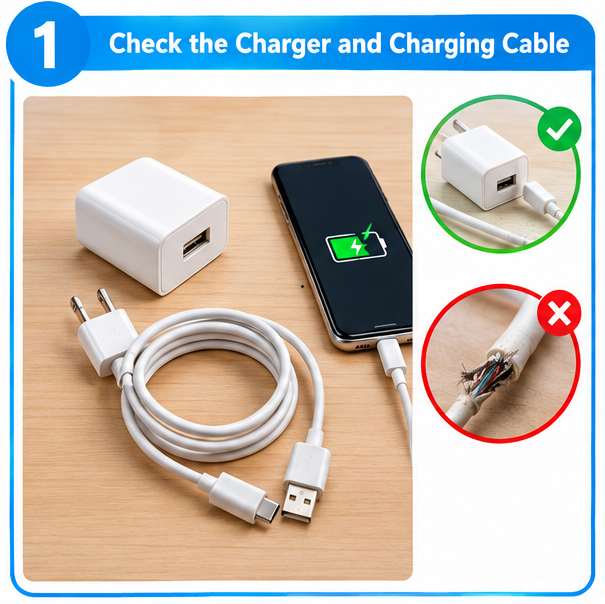
The first step is often to verify whether the charger and cable are working properly.
A technician can test the phone using a known-working charger and cable. If the device starts charging normally, the original accessory may be responsible for the problem.
This basic check is important because not every charging complaint is caused by the phone itself.
2. Inspect the Charging Port
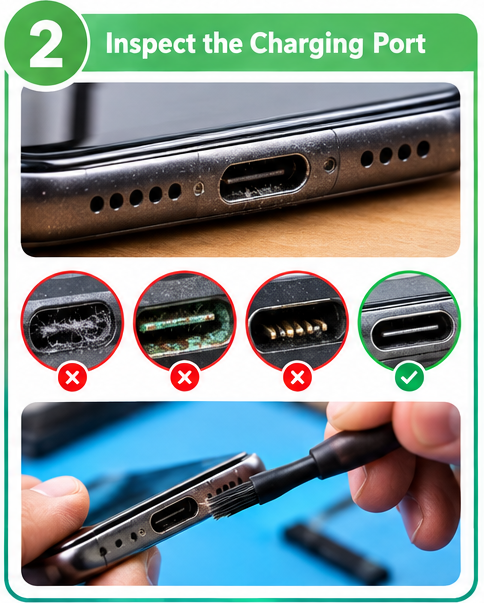 The charging port is another important area to examine :
Dust, lint, corrosion, bent contacts, loose connections, or physical damage can prevent proper contact between the charger and the phone.
A technician visually inspects the port and checks whether the connector sits correctly. Care should be taken during cleaning because excessive force can damage delicate contacts...
3. Observe the Charging Behaviour
A technician should also pay attention to exactly what happens when the charger is connected.
For example:
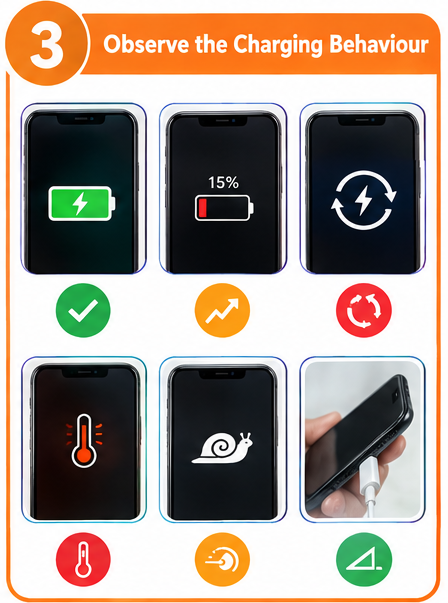
-
Does the phone show a charging symbol?
-
Does the battery percentage increase?
-
Does charging start and stop repeatedly?
-
Does the phone become unusually warm?
-
Is charging extremely slow?
-
Does the phone work only when the cable is held at a certain angle?
These observations provide useful clues about the possible location of the fault.
Checking the Battery Condition
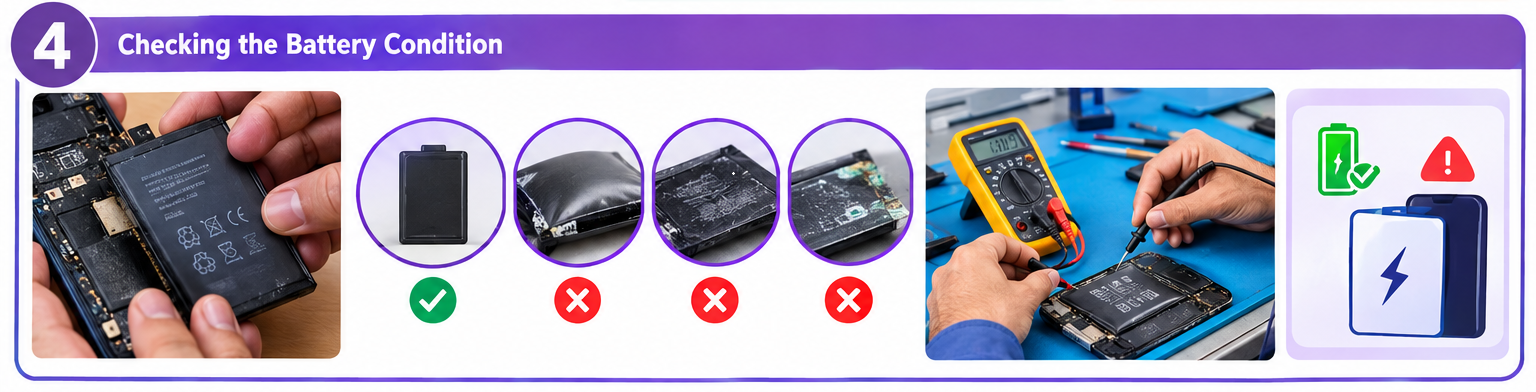
The battery plays an important role in the charging system. A damaged, weak, swollen, or degraded battery can create charging-related symptoms.
A technician may examine the physical condition of the battery and perform appropriate electrical tests using repair equipment.
However, battery symptoms should not automatically lead to battery replacement. A good troubleshooting process considers other parts of the charging path before deciding which component is actually responsible.
Using a Multimeter for Testing
A multimeter is one of the important tools used during electronic troubleshooting.
During mobile repair training, students can learn how to use testing instruments to examine components, connections, and electrical conditions. SMTTC’s mobile repairing course specifically includes component testing, charging-related faults, multimeter use, and systematic fault finding.
A technician may use testing equipment to check whether the expected electrical conditions are present at different points of the circuit.
The purpose is not simply to take a measurement. The technician has to understand what the measurement means and how it helps narrow down the fault.
Checking Connections and Components
If the charger, cable, and port appear normal, the technician may move deeper into the device.
This can include checking:
-
Charging connector connections
-
Relevant board connections
-
Battery connection
-
Components associated with charging
-
Possible damaged tracks or solder joints
-
Signs of corrosion or liquid damage
At this stage, proper device opening and handling techniques become important. A repair technician should work carefully to avoid causing additional damage.
What Are Common Mobile Charging Faults?
Different charging problems can have different causes. Some common complaints include:
Phone Not Detecting the Charger
The device may show no response when the charger is connected. The technician needs to determine whether the problem is related to the accessory, port, battery, connection, or charging section.
Slow Charging
Slow charging may result from a weak charger or cable, battery condition, charging configuration, connection issues, or an internal fault.
Charging Stops and Starts
Intermittent charging can sometimes indicate a loose or damaged charging port, poor cable contact, or another connection-related issue.
Charging Only at a Certain Angle
When a phone charges only after moving or holding the cable in a particular position, the charging port or its physical connection deserves careful inspection.
Phone Heating During Charging
Unusual heating should not be ignored. A technician needs to inspect the device carefully and determine the source before continuing with repair work.
The Importance of a Step-by-Step Troubleshooting Process
One of the biggest differences between guessing and professional repair is the troubleshooting method.
A beginner may think:
Phone not charging → Replace charging port
But a technician should think more systematically:
Customer Complaint → Initial Inspection → Accessory Test → Port Check → Battery Check → Electrical Testing → Fault Identification → Repair → Final Testing
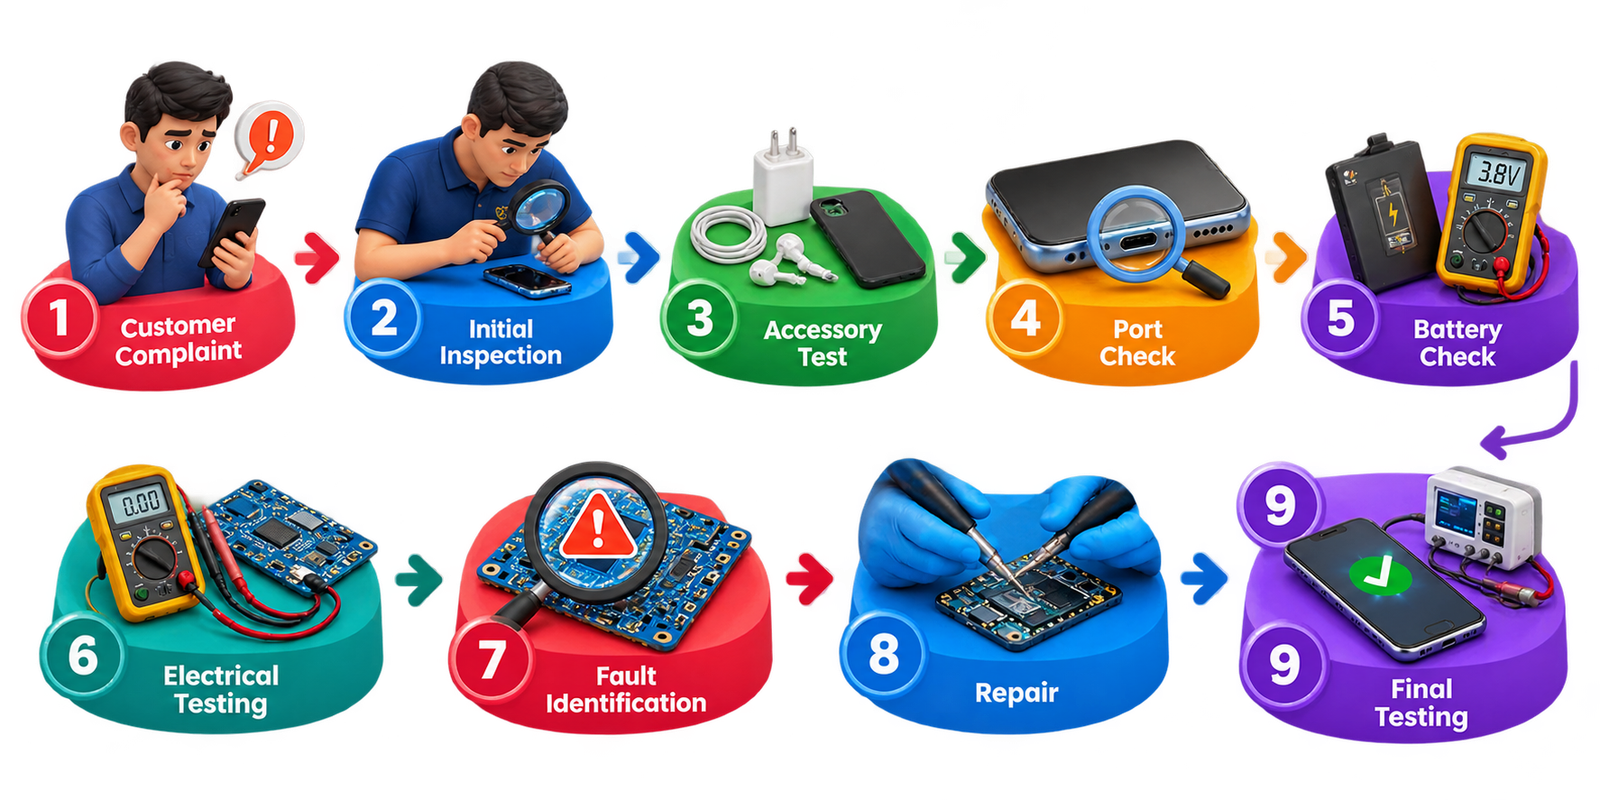
This approach reduces unnecessary part replacement and helps develop stronger diagnostic skills.
What Tools Can Help Diagnose Charging Problems?
A mobile technician may use different tools depending on the device and the type of fault.
Common repair and diagnostic equipment can include:
-
Multimeter

-
DC power supply
-
USB or charging testers
-
Precision screwdrivers
-
Inspection tools
-
Soldering equipment
-
Cleaning and repair accessories
Learning how to use these tools correctly is an important part of practical mobile repairing. Tools are useful only when the technician understands when and how to use them.
Why Practical Training Matters in Mobile Repairing
Mobile phone repair is not only about memorising component names. A technician needs to understand how to approach an actual device when the symptoms are unclear.
For example, two phones may show the same complaint - “not charging” - while the underlying causes are completely different.
- One may have a damaged cable.
- Another may have a blocked or damaged charging port.
- A third device may have a battery-related problem.
- Another may require deeper circuit-level diagnosis.
Practical training allows learners to observe different fault conditions and understand how technicians move from symptoms to diagnosis. SMTTC’s current mobile repairing program focuses on hands-on work with smartphones, live device diagnostics, component testing, charging faults, and systematic troubleshooting.
What Should a Beginner Learn About Mobile Charging Repair?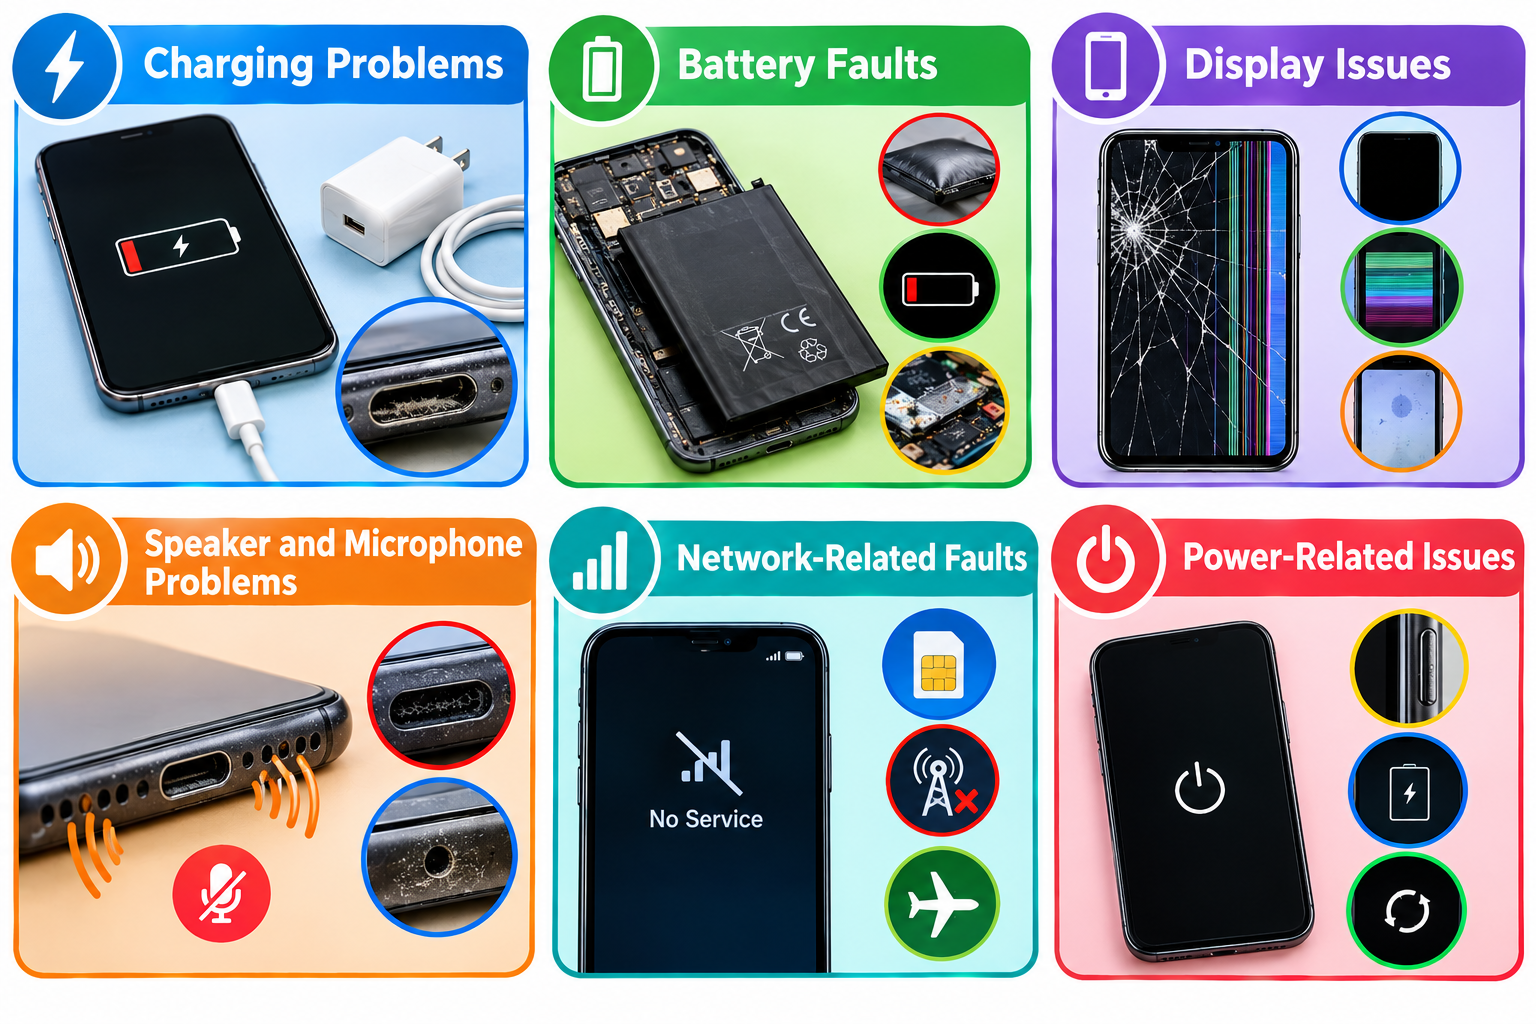
Someone beginning mobile repair should build knowledge in stages.
First, understand the basic parts of a smartphone and their functions. Then learn safe device opening, component identification, basic electrical concepts, and testing methods.
After that, the learner can practise troubleshooting common faults such as:
-
Charging problems
-
Battery faults
-
Display issues
-
Speaker and microphone problems
-
Network-related faults
-
Power-related issues
The goal should be to understand why a fault occurs, not simply memorise a particular repair.
From Diagnosis to Final Testing
Repair work does not end when a damaged component is replaced.
After the repair, the technician should test the phone again.
For a charging-related repair, this can include checking whether:
-
The charger is detected properly
-
Charging remains stable
-
Battery percentage increases normally
-
The device behaves normally during charging
-
The repaired connection remains secure
Final testing is important because a repair should solve the original problem without creating a new one.
Develop Mobile Repairing Skills Through Practical Learning
Mobile phone charging problems are a good example of why troubleshooting is such an important skill for a technician. The visible symptom may be simple, but identifying the actual cause can require observation, testing, technical knowledge, and practical experience.
A structured Mobile Repairing Course can help beginners learn these skills step by step—from understanding components and tools to testing faults and working on real devices.
For students interested in building practical mobile repair skills, SMTTC provides hands-on mobile repairing training covering common hardware faults, charging problems, component testing, and troubleshooting methods.
Learn Mobile Repairing at SMTTC
If you want to learn mobile phone repairing through practical training, SMTTC Institute provides a skill-focused learning environment where students work with smartphones, repair tools, and real fault conditions.
The training covers areas such as mobile components, fault finding, component testing, charging faults, display and battery issues, network problems, and basic software-related work.

Learn → Practise → Diagnose → Repair → Test → Build Technical Skills
To know more about the Mobile Repairing Course in Patna, course details and admission information, visit:
https://smttcinstitute.com/courses/mobile-repairing
Contact: 7870516006